Recommended routes: Table Mountain
There are many routes up Table Mountain and the major question in choosing a route is 'How much time do you have?'.
|
|
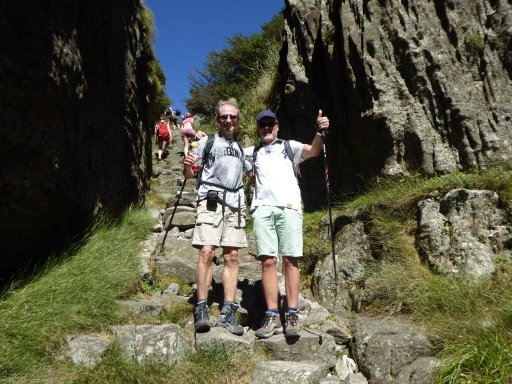
Approaching the summit of Platteklip Gorge.
|
Platteklip Gorge: Undoubtedly, the quickest and safest route to the summit for the inexperienced visitor, is via Platteklip Gorge. This routes is very much like climbing a long staircase, which zig-zags all the way up the gorge. But the views are increasingly limited as you ascend deeper between the sheer rockfaces on either side. So, although this is a relatively easy route which can be achieved in approx. 2 hours, it does not offer the spectacular views of many other routes, is not nearly as interesting and you're unlikely to see much wildlife. But, if all you want to do is achieve the summit, this is the best way to go!
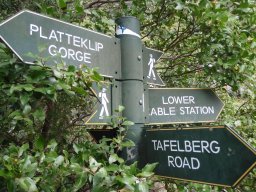
NB: Make sure you are on the right route! Tourists have been known to ascend the path to the right of the lower Cable Station and then onto the India-Venter route, thinking they are climbing Platteklip Gorge. See: Why tourists get lost on Table Mountain, to avoid getting lost.
Full-day routes: If you have a full day to climb Table Mountain, a variety of other longer routes are available which offer a variety of spectacular views, interesting landmarks, wildlife and historical features. All of these walks will inevitably involve two stages: a) Ascending the Back Table and b) Ascending to Maclears Beacon.
Ascending the Back Table: This can be done from Kloofnek, via the Pipe-Track and then Kasteelspoort, Corridor Ravine or Diagonal Route. Of these, the Diagonal Route is easily the more interesting and brings you close to Desolation Valley, MCSA Hut, Tranquility Cracks, Woodhead Dam, Dam Museum.
But the Back Table can also be achieved via Constantia Corner from Constantia Nek, or via Skeleton Gorge from Kirstenbosch. Skeleton Gorge will bring you out, right alongside the Hely-Hutchinson Dam from where you can connect with the Jeep Track. Similarly, Constantia Corner will connect you (a little furher South) with the Jeep Track.
Ascending to Maclears Beacon: However you get onto the Back Table, my recommendation for stage 2 would be to follow the Jeep Track to Disa Gorge, on the far-side of the Hely-Hutchinson dam; and from the top of Disa Gorge, follow the aqueduct to connect with Smuts Track, to get to Maclears Beacon. All of these routes are likely to take a minimum of five hours' walking; so add your breaks and sight-seeing stops to that.
Half-day routes: Other more direct routes up Table Mountain are back on the front face of Table Mountain: Ledges, Left Face B, India-Venster and Kloof Corner Ridge.
Ledges: Interesing ascent on the Eastern corner, brings you directly onto Maclears Beacon in about 2.5hrs. This route involves some C-grade scrambling, so not advised without a guide, unless you have some rock-climbing experience and equipment; and are competent to find your way in unknown terrain.
Left Face B: Another easier but interesting ascent in about 2.5hrs, with some B-grade scrambling. Without any clear path in many places, this is also not advised for the inexperienced visitor.
Kloof Corner Ridge: A spectacular C-grade scramble on the Western corner, is well-recommended as it offers great views, but certainly not recommended without some serious scrambling experience, a rope ... and a guide. From the top of the ridge it is a further hour to the upper cable station, so a full 4hrs.
|
|
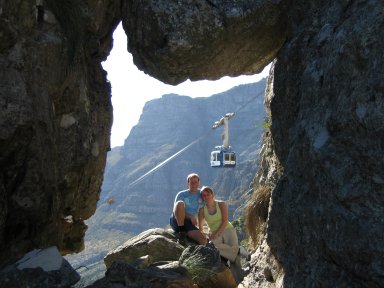
The 'venster', an Afrikaans/Dutch word for window, which feature gives this route its name.
|
India-Venster: My recommendation, as this B-grade scrambling route winds its way up the front of the mountain directly above and between the upper and lower cable stations; offering stunning panoramic views of the city bowl, Table Bay, Devils Peak, across the Cape Flats to the Hottentot Holland mountains, Lions Head and the 12 Apostles, stretching all the way to Hout Bay.
The route is diverse and interesting and you're likely to see at least some wildlife (Sun Birds, Dassies), over the 3hrs. Should be done with a guide, unless you have scrambling experience and are able to read a map/guide.
NB: Tourists regularly get lost on this route and some have died trying.
Climbing Table Mountain without a guide
|
|
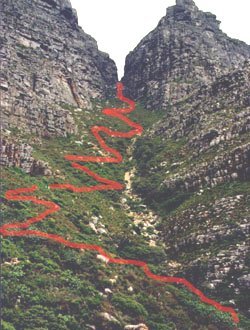
Looking straight up Platteklip Gorge.
|
For the inexperienced visitor, the quickest, easiest and safest route up Table Mountain is Platteklip Gorge. The gorge can be seen as the distinct 'crack' between the left and right tables, when looking up from the city.
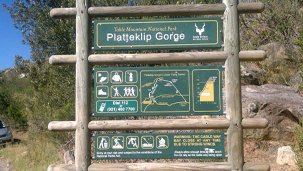
The gorge is easily accessible from Tafelberg Road, about 1.5km from the lower Cable Station and is well sign-posted. Get your taxi to drop you off at the sign-board that marks the start, or walk up to the Contour Path from the lower Cable Station and then South-East (turn left) along the Contour Path until you come to the sign-post that marks Platteklip Gorge, about 20 min away. Make sure you find the sign - some visitors have got lost or found themselves in precarious areas, simply because the were not on the path they thought they were. See this BLOG ARTICLE: 'Why tourists get lost on Table Mountain', to avoid getting lost.
|
|
The sign-post that marks the start of the route from the Contour Path.
|
The slog up the gorge will take anything from one to two hours, depending on your level of fitness. But once on the (correct) path, it is almost impossible to get lost, as the path is obvious and well-used and ascends between the two sheer sides of the gorge; so there isn't really anywhere to go, other than to follow the path.
|
|
The sign-board that marks the start of the route from Tafelberg Road.
|
NOTE: Platteklip Gorge is not the most spectacular route. The path winds up into the gorge which gets increasingly narrow, so the view as you go up is less and less. But any other route is not advised without a guide.
What to wear ... and take with
CLOTHING: The weather on the mountain-top (1086m above sea-level) can be very different to what it is in the city. It might be hot at the bottom, but mountain weather is very changeable and it could be COLD on top. The 'tablecloth' clouds that often cover the mountain, carry a lot of water vapour which condenses on contact and can leave you feeling quite 'damp'. Wear suitable clothing and take a jersey, just in case. It's not likely to rain in summer, but check the weather report to make sure; and take a rain-jacket if advised.
|
|
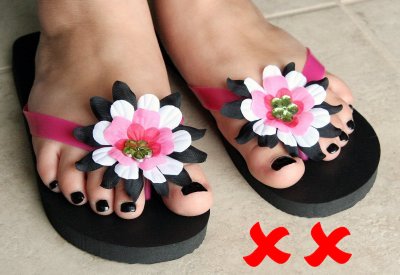
NO! ...flip-flops are a definite no. They offer no support, or traction and are likely to break, leaving you barefooted.
|
|
|
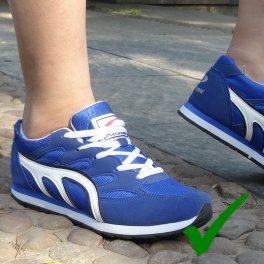
OK! ...track shoes with rubber soles are a reasonable compromise.
|
|
|
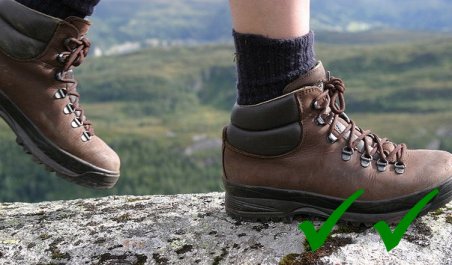
Ideal! ... strong boots with ankle support.
|
SHOES: Mountain paths are of course rough and uneven. Wear stong rubber-soled shoes or boots, preferably with some ankle support, to avoid slipping or sliding and thus falling. Flip-flops are definitely not suitable and are likely to break. You do not want to be standing barefooted, half-way up!
WATER: Temperatures in Cape Town can reach 40 deg C in the height of summer. Exercising in this heat, your body will lose fluids and you run the risk of dehydration (or heat exhaustion) if you don't drink water. You are advised to take at least 2litres of water per person and drink regularly to keep yourself hydrated. UV radiation can also be very high, so wear sun-screen to prevent sun-burn.
FOOD: Make sure you eat a decent breakfast before you set out and take some sandwiches or snacks (energy bars) with you.
OTHER: Also take a mobile phone and some money (you might need a ride down).
!!! Falling victim to any of the above, while on the mountain, can leave you in danger ... you can't call a cab to get a lift back down!
EMERGENCY CONTACT NUMBERS:
Mountain Rescue (WSAR, Western Cape): 021 9370300
Brent Russell: 0725854294 / David Nel: 0824999656 / Andy Wood: 0823383176
City Public Emergency Centre: 021 4807700 / 107 / 112
Cape Town Tourism Visitor Support: 021 4876800
TM Aerial Cableway (TMACC): 021 424 0015
TMACC Weather Report: 021 424 8181
(will also advise if the Cable Car is running), OR SMS 'Cableway' to 42101 (the information will be sent to you at a cost of R1.50).
South African Police Services (SAPS): 10111
Ambulance: 10177
Poison Helpline: 0861555777
Note: No signal? Walk up to the nearest edge of the mountain within sight of a built-up area. An SMS/text message often gets through where no call is possible, but be sure to send the message to your own cell phone number as well - if you receive your own SMS, then it will have gone through. If you do have a signal, try to save battery power and remain contactable!
No airtime? Dial 112 (or 911, now linked to our local 112 number) – a free call, and operable without airtime. However, you do need a signal, and a SIM card.
SNAKE BITE:
|
|
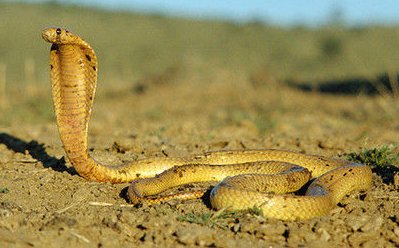
Cape Cobra is very seldom seen but can inflict a fatal neurotoxic bite.
|

|
|
Puff Adder is more common and can inflict a cytotoxic bite, causing extreme pain, swelling and damage to muscle tissue.
|
Yes, there are snakes on Table Mountain. But like any wild animals, they are likely to move out of the way before you even see them. Wild animals will generally only attack when threatened, or provoked.
Snake venom is cytotoxic (breaks down muscle tissue), neurotoxic (attacks the nervous system to cause paralysis) or haemotoxic (causes internal bleeding).
Most fatalaties are caused by (neurotoxic) Cobras, which can cause paralysis after about 2 hours.
But the most likely snake-bite is from the Puff-Adder or Rinkals, which (instead of moving away) will sometimes roll over and 'play dead'.
Treatment:
- Call for help immediately - early, appropriate medical attention is essential
- Keep the patient seated and calm - panic or excess movement will cause the venom to move around the body
- Remove jewellery and constricting garments (cut them off with minimum movement)
- Keep the affected limb lower than the heart
- Apply a splint to the length of the limb, taking care to pad pressure points
- Cover the entire affected limb with a firm bandage, to inhibit the lymphatic drainage of the limb and decrease movement of the toxin around the body
- Monitor the victim’s breathing and heart-rate
- Apply CPR if breathing is absent or inadequate
BLISTER BUSH:
|
|
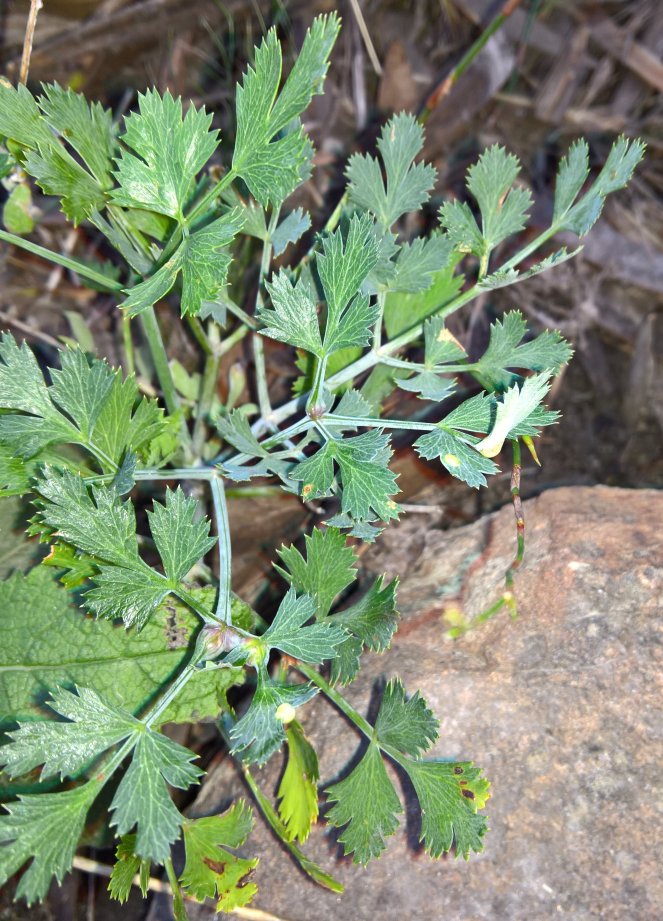
The leaves of the Blister bush have a distinctive shape, as seen here.
|
The only 'poisonous' plant on Table Mountain is the Blister bush (Notobubon galbanum). The bushes have leaves that look like celery, and very small yellow flowers that look like pin-cushions. It is of the same family as edible plants, such as the carrot and herbs such as fennel and dill; but it is NOT edible.
Blister bush is not life-threatening, but simply touching it can cause skin irritation and severe blistering, particularly if the irritant chemicals are exposed to sunlight.
The surface of the plant is covered in a mix of chemicals including psoralen, xanthotoxin and bergapten. Exposure of the affected skin to ultra violet light (such as sunlight), triggers the effects of the plant's toxins; a phototoxic reaction, resulting in blistering, two or three days after exposure.
Preventing the blister from forming is the best way to deal with it; although you might not even be aware of it, until the blistering appears. Washing the affected area immediately can help and preventing any exposure to ultra violet light will reduce and/or eliminate the blistering. It could also help to apply suntan lotion as well, with a screen factor of 50 or more. Re-apply the lotion as soon as the itching starts again. If untreated, the welt should stop itching and weeping after the first five to seven days.